
These book bags are quick and easy, and don't take much fabric. They are completely reversible and unexpectedly sturdy. It isn't a complicated or unique pattern, but it is my own design, so please make one only for your own use, not for sale. Thanks!!
Materials: 2/3 yard each of a shell fabric and a lining fabric, and some coordinating thread. For this project I used pink quilter's batik for the shell and "Bolero" by the Alexander Henry Fabric Collection, both from JoAnn's, and hot pink Dual Duty thread.
1. iron both materials, but keep the natural fold down the center so it is easier to cut.

2. choose one fabric (both will be cut the same size)
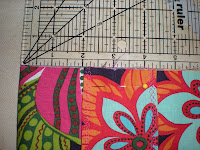
3. cut one piece 15"x31" (if on the fold, cut one on fold 15" wide by 15.5" tall)
4. cut two pieces 3"x29" (if on the fold, cut 2 - 3"x 14.5")
5. cut one 10.5"x10.5" (or whatever rectangular size you would like to make your pockets)
6. repeat steps 3-5 with the other fabric - if you only want one pocket, only do step 5 once
7. turn over edge of each pocket 1/2" for a hem, and iron in place. double fold (rolled hem) the top of the pocket to prevent fraying.

 8. use a decorative top stitch to sew to sew all four sides, then sew just the top of the pocket with a straight stitch.
9. center the pocket on the shell and sew the other three sides to it. make sure to backstitch several times at the top of the pocket to keep it from tearing with use. if you are doing pockets on the inside as well, repeat steps 7-9 with the other pocket and the lining.
 10. with right sides together, sew the shell down each side using a 1/4" seam, then iron the seam open. do the same with the lining fabric (you should have two "bags" when you're finished)
 11. fold the bottom corner across and pin it. measure 2.5" across and mark a line. repeat this on both corners of each bag.
 12. sew across the line on all corners.
13. cut the corner off, leaving about 1/4"
 14. you should have 4 handle pieces. using one of each color, put the right sides together and sew down both long sides with a 1/4" seam allowance. leave the short ends open
 15. turn the handles right side out and press flat
16. top stitch with your decorative stitch the outer edges of the two long edges of each handle, right next to the seam, then repeat with the other set of handles. you should have two handles when you are finished. set them aside.
 17. back to the bag...turn the lining right side out, but do not turn the shell! the shell should still be inside out
18. pin the handles to the lining 2" from the side seams on both sides and baste or pin in place.
 19. put entire lining+handles combination inside shell
 20. pin the tops together, matching side seams
21. sew the tops together with a 1/2" seam (this is different than other seam allowances!), leaving the space between one set of handles open
22. turn bag right side out CAREFULLY
23. push the lining inside the shell
24. iron the seam
 25. use the decorative top stitch to sew completely around the top of the bag, closing the hole in the process.

2 comments:
I found an email in my box this morning letting me know about your fabulous tutorial. It's fantastic, I love all the pictures you posted as well. I'll be including it in today's Daily DIY at 4pm and just wanted to let you know!
Off to explore the rest of your blog...
Very cool! I saw it on oneprettything.com and was impressed! I love the fabrics you used here...I bet even an old 4-h sewer like me could do this! (But not as well as you!) ;)
Post a Comment