Showing posts with label book bag. Show all posts

3.06.2010

National Pi Day

March 14 is National Pi Day, or at least it is with math teachers. You see, pi is the ratio of the circumference to the diameter of a circle. The ratio itself is 3.14159.... and continues out into infinity. So March 14, or 3.14, is National Pi Day and among math teachers, is celebrated with pie. Because our school day ends at 2:03 (which is a mere 4 minutes after 1:59, the next three numbers of pi after 3.14), in our school, it is celebrated at 1:59 on March 14. (3.14, 1:59).A few days ago, an image popped into my head on the way to school and I couldn't get it out. So this weekend, I sketched it out, made it into a wax paper transfer, and made it into a bag. I think it's pretty cool.....what do you think?

The shell is a really light canvas and the lining is cocoa brown nubby linen-looking material I got from freecycle.

12.30.2009

It's My Birthday - Again

I blame my parents for this awkward, between-Christmas-and-New-Year's birthdate which I have never once celebrated with a birthday party with friends on the actual date. On the other hand, I have never once had to go to school or work on my birthday. =)

I am writing this post ahead of time, so I am not sure what I am going to be doing....a trip to the museum or taking myself to a movie are two possibilities, or maybe making a purse for myself.
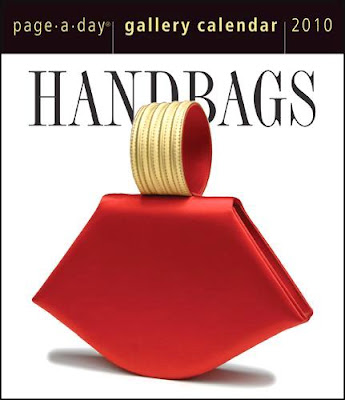
I did buy myself a little gift.....I walked into a calendar store and it jumped into my hand, I swear. I may or may not have spent 2 hours flipping through it last night. There are 313 different bags, some by high-end designers and some by unknown artists, spanning a length of time between the early 1800s and 2008. Anyhoo.....I won't be doing the big birthday extravaganza giveaway from last year, despite the fact that I will be turning 30 for the second time. But I do want to give you, my awesome blog buddies, a small token of thanks for sticking with me, despite the sporadic blogging and more than the acceptable amount of whining lately.
So if you would like to win this Wicked Witch bag, leave me a comment with what you like to do on your birthday. I'll draw one on New Year's day (Friday) sometime.
Thanks again for reading and good luck!

11.08.2009

Toasty Hands, Thankful Heart

I have spent the weekend sewing. It was blissful, glorious, and so incredibly relaxing. I was able to catch up on 2 backlogged projects people had paid me to do back in September right before I broke my arm, and do a little sewing for myself. I was able to use some of that creative fog swirling around in my head - making things a little clearer. I am so thankful to regain both the time to sew and the physical ability to use my right arm again.

I finished this bag for a repeat client - the specifications were hers, and I think it turned out really crisp and awesome.
I made some placemats for another repeat client - and then was in a hurry to leave the house and forgot to take a picture. D'OH! Nothing too complicated there, just basic 2-sided placemats. She wanted Christmas fabric on one side and fall fabric on the other. I did feel that I was channeling Project Runway and Tim Gunn a little, since I had some trouble with my original idea and ended up having to rework it a couple of times. ("Make it Work!!"

The other thing I worked on was just for me. I work evenings at various sport events to earn some extra money, and I generally work the ticket booth for football and soccer games. I can be there for as long as 4 hours at a time, and the weather this week turned really cold and wet. I can't wear gloves to work the ticket booth because I can't make change, and in addition, the palms of my hands tend to run really warm and I can't wear gloves for long without ripping them off. But I did want something, since my wrists and arms get cold, so I have been contemplating fingerless gloves for some time. The problem was that all the online tutorials I could find were for knitted or crocheted gloves, and I can't do either of those things.

Last night while I was working the ticket booth, I just sort of rolled the idea around in my head (between drunk and smelly parents buying tickets for the game). The problem was that I wanted thumbs on the gloves. It would be easy to just sew a tube, or sew a tube and cut a slit for the thumbs, but I wanted actual thumbs in the gloves. I had a bunch of jersey knit I had gotten for free off of freecycle a few months back, so today I pulled it out and just started playing with it.
One of my biggest concerns was that I have had very little luck with knits. My mom's machine ate knits, so I never sewed with it growing up. In addition, I do not have a serger, which seems to be the accepted and easy way to sew knits. But the fabric was free, it wasn't like I was going to be out any money, so I just jumped in.
I ended up with these. I may have made 4 pairs already. I love them. Everyone is getting a pair for Christmas. Easiest Christmas Present Ever.
I like that they have long thumbs and long hands, so they can be folded down or up, depending on what you need, and the sleeve end can be folded or scrunched as well. I also like that they are t-shirt weight, which is light enough to wear easily and still stay warm. They could also be worn underneath a heavier pair of gloves without any trouble at all. I am a little proud of these. I may make a bunch and try to sell them. I looked on etsy, and as far as I can tell, there is nothing quite like these listed. If nothing else....I am both trendy AND warm. I can't decide whether or not to do a tutorial. I have the pictures for it, but am going to let the idea roll around for a while before I decide.

6.01.2009

Weekend Projects

I have been feeling a surge of creativity recently, and have been tackling some of the backlog of projects, UFOs, and preparing to restock the etsy shop at the beginning of July (er...notice how empty that space to the right there looks?). This weekend I worked a track meet all day on Saturday, so the majority of this was done on Sunday.
I modified the pattern I've been working on, it's closer.....it's harder to make this pattern with upholstery fabric, but I do like the way it drapes. It's lined with dark goldish cotton. I actually had these cut out for quite a while...they may be a birthday present for my sister. Or not. I am pretty proud of this...it is my own pattern (super SIMPLE pattern, but still). It is for my niece. You can tell those are birds, right? They are also my own pattern. I need to refine the top bird's body a little bit, but I do really really like it. And of course, for the etsy shop....more t-shirt bags. Gotta love Goodwill. Ok, back to the birds...can you tell what they are or do they look too "artsy?" And do they look too close to anything else you've seen? I drew them myself, but I stalk so many craft blogs that I am really afraid that I copied them from someone unknowingly. Has anyone seen them somewhere else?

8.25.2008

Orange and Fabulous

As I lazily enjoyed my more-or-less last day of summer (did you know that teachers have to go back to school a week before the kids????) I worked on the last of the t-shirt bags today...and for the first time, sold an item on etsy in less than 24 hours! Cool stuff! Here's the bag that sold today (I didn't even have a chance to post it on here!)


And here is the t-shirt bag I finished today! It is lined with very soft sky blue flannel.

8.21.2008

School Bag for Me

I bought some material a few months ago to make myself a school bag, but I wanted something a little different, so I waited until I had some ideas and had drawn up a plan. Here is the finished product. There are still a few bugs to work out, and it would hang better if I had a normal sized chest, but I still like it. The color is kind of wrong in some of these pictures, it is a moss green corduroy, lined with very light tan-colored linen, and trimmed with black and gold brocade ribbon.


My first college major was interior design, and my favorite class was drafting, so I tend to use graph paper to sketch out all my designs.


this is pretty close to the actual color


I am kind of proud of the top closures, the design is totally my own. I also borrowed an idea from a blog I saw recently (I can't remember which one, sorry!) and used hair elastics for the button closures. I also learned that you should not iron hair elastics.


I found some 3 packs of caribiners at JoAnns a while ago for a dollar a pack and used one of them for the connection ring.


8.11.2008

Winding Down


I plan on spending tomorrow at school and hope that at that point I will be motivated to start working on lesson planning, but as of now I am still in sewing mode. I finally felt confident enough to try my hand at a girl's A-line dress, but I cannot find a pattern that I like, so I have had to just try and design a pattern of my own. I think I like this one, although I would probably make the dress a little longer next time, or the top a little narrower. I made it from an old tablecloth that was given to me by a friend and the design in the tablecloth kind of determined the particular shape. It is cotton and is completely lined, with button closures on the top straps.

I also made a school bag for myself last night, while watching the men's swim team win the most amazing race in Beijing, defeating the trash-talking French (mwa ha ha ha!). This is the same bag I had previously screwed up, but I gave it another shot and now I like it. It is made from an old t-shirt from Goodwill (99 cents!) and lined with black twill.

And in the same line, I made another t-shirt bag that I will try to sell on etsy. I wish I knew how to target a high school audience, these are the same size and shape of school bags that my kids carry and I have seen them wear this same shirt before. This one has handles that are 4 inches shorter than the other bags I have made. It is lined with chocolate brown flannel (which I remembered to wash this time) and has an inner pocket.

7.28.2008

More Book bags

These are the rest of the orders from the previous post, but these are the adult bags. I hope they get a lot of enjoyment out of them! They presented some unique challenges, including sewing with suiting material that frayed completely apart if I glanced in its direction. So...here they are:


I TOTALLY intended this asymetrical pocket from the VERY BEGINNING. NOT because it refused to cooperate and line up correctly. =)

7.23.2008

Book Bag Tutorial

I love it when people share their cool stuff, especially bags, so I figured it is time to give back! This is my first tutorial, so if you use it and have comments or questions, please email me and let me know.


These book bags are quick and easy, and don't take much fabric. They are completely reversible and unexpectedly sturdy. It isn't a complicated or unique pattern, but it is my own design, so please make one only for your own use, not for sale. Thanks!!


Materials: 2/3 yard each of a shell fabric and a lining fabric, and some coordinating thread. For this project I used pink quilter's batik for the shell and "Bolero" by the Alexander Henry Fabric Collection, both from JoAnn's, and hot pink Dual Duty thread.


1. iron both materials, but keep the natural fold down the center so it is easier to cut.


2. choose one fabric (both will be cut the same size)
3. cut one piece 15"x31" (if on the fold, cut one on fold 15" wide by 15.5" tall)
4. cut two pieces 3"x29" (if on the fold, cut 2 - 3"x 14.5")
5. cut one 10.5"x10.5" (or whatever rectangular size you would like to make your pockets)
6. repeat steps 3-5 with the other fabric - if you only want one pocket, only do step 5 once
7. turn over edge of each pocket 1/2" for a hem, and iron in place. double fold (rolled hem) the top of the pocket to prevent fraying.


8. use a decorative top stitch to sew to sew all four sides, then sew just the top of the pocket with a straight stitch.


9. center the pocket on the shell and sew the other three sides to it. make sure to backstitch several times at the top of the pocket to keep it from tearing with use. if you are doing pockets on the inside as well, repeat steps 7-9 with the other pocket and the lining.
10. with right sides together, sew the shell down each side using a 1/4" seam, then iron the seam open. do the same with the lining fabric (you should have two "bags" when you're finished) 11. fold the bottom corner across and pin it. measure 2.5" across and mark a line. repeat this on both corners of each bag. 12. sew across the line on all corners.
13. cut the corner off, leaving about 1/4"
14. you should have 4 handle pieces. using one of each color, put the right sides together and sew down both long sides with a 1/4" seam allowance. leave the short ends open15. turn the handles right side out and press flat
16. top stitch with your decorative stitch the outer edges of the two long edges of each handle, right next to the seam, then repeat with the other set of handles. you should have two handles when you are finished. set them aside.
17. back to the bag...turn the lining right side out, but do not turn the shell! the shell should still be inside out
18. pin the handles to the lining 2" from the side seams on both sides and baste or pin in place.
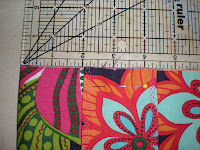
19. put entire lining+handles combination inside shell 20. pin the tops together, matching side seams
21. sew the tops together with a 1/2" seam (this is different than other seam allowances!), leaving the space between one set of handles open
22. turn bag right side out CAREFULLY
23. push the lining inside the shell
24. iron the seam
25. use the decorative top stitch to sew completely around the top of the bag, closing the hole in the process.